
Client choices and prices
Options your client switches in the tour, each with a price or note that lands in the quote request.
Client choices let your client switch a surface or an item inside a style, for example the feature wall between cream travertine, Nero marble and walnut, and see the price of each. Their picks travel with every quote request and design approval.
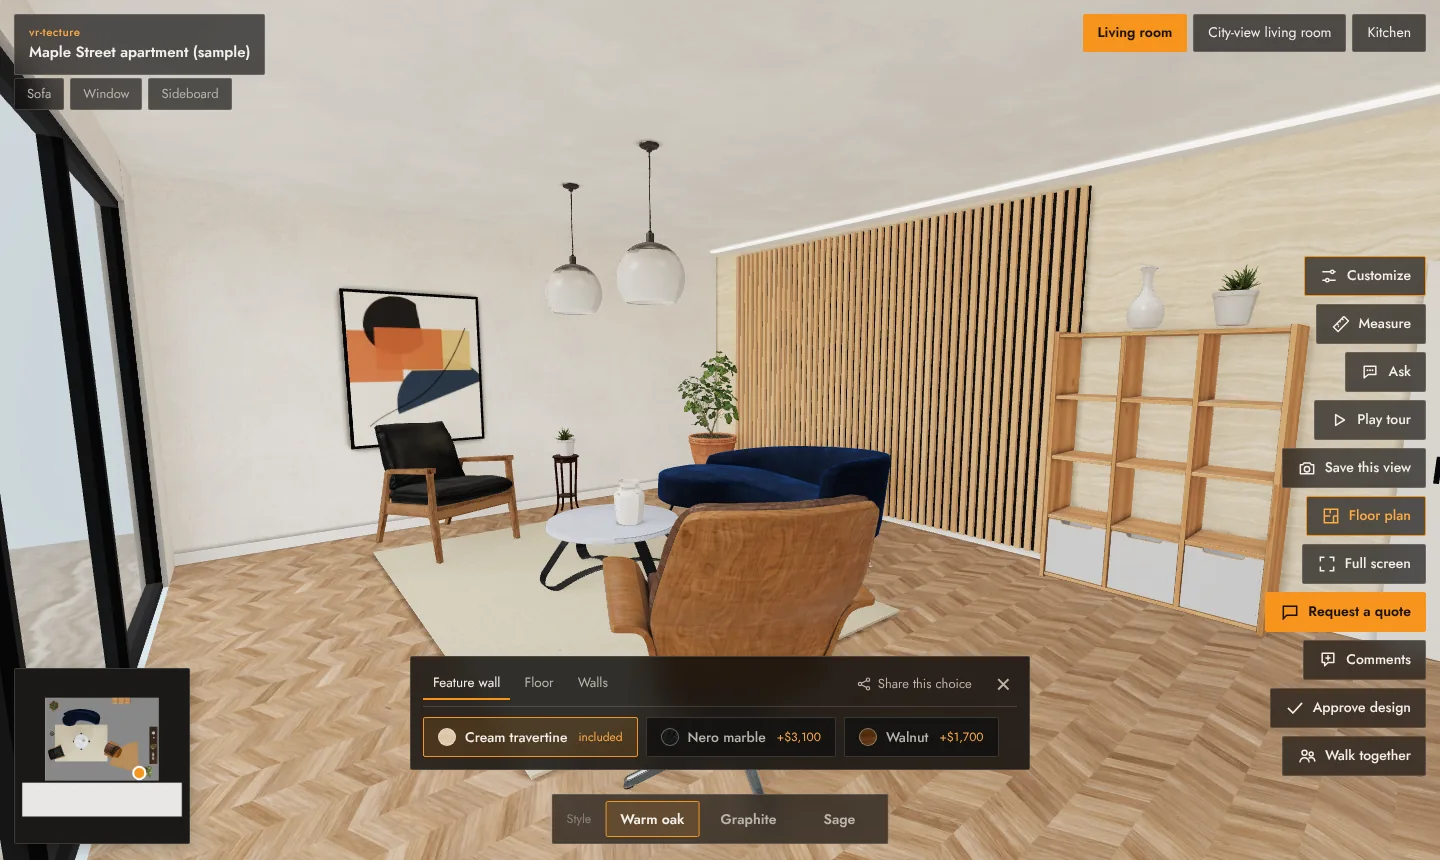
Add choices to a surface
- In the tour editor, open Finishes on the style and give the surface a material. See Dress surfaces with real materials.
- Under Client choices, select + Option and pick another material.
- Fill in Name for the client (the tab label, for example “Feature wall”), each Option name (“Nero marble”) and Price / note (“+$3,100”, “included”, “on request”).
- The first option is the Default: what the client sees when the tour opens.
- Select Done and Save tour.
Suggest client choices
This adds three related options to every dressed surface: other wall colours, other floors, other stones. Then you only add your prices.
The price field is free text, so write it the way you quote: “+$3,100”, “+12%”, “included”, or leave it empty.
What the client does
- Selects Customize in the tour, or taps a piece of furniture or the floor.
- Switches between the tabs (one per surface or item) and picks options. The room changes at once, in the same light.
- Uses Share this choice to copy a link that opens the tour exactly as they set it, for a partner or for you.
- Sends Request a quote or Approve design: their selections are included automatically.
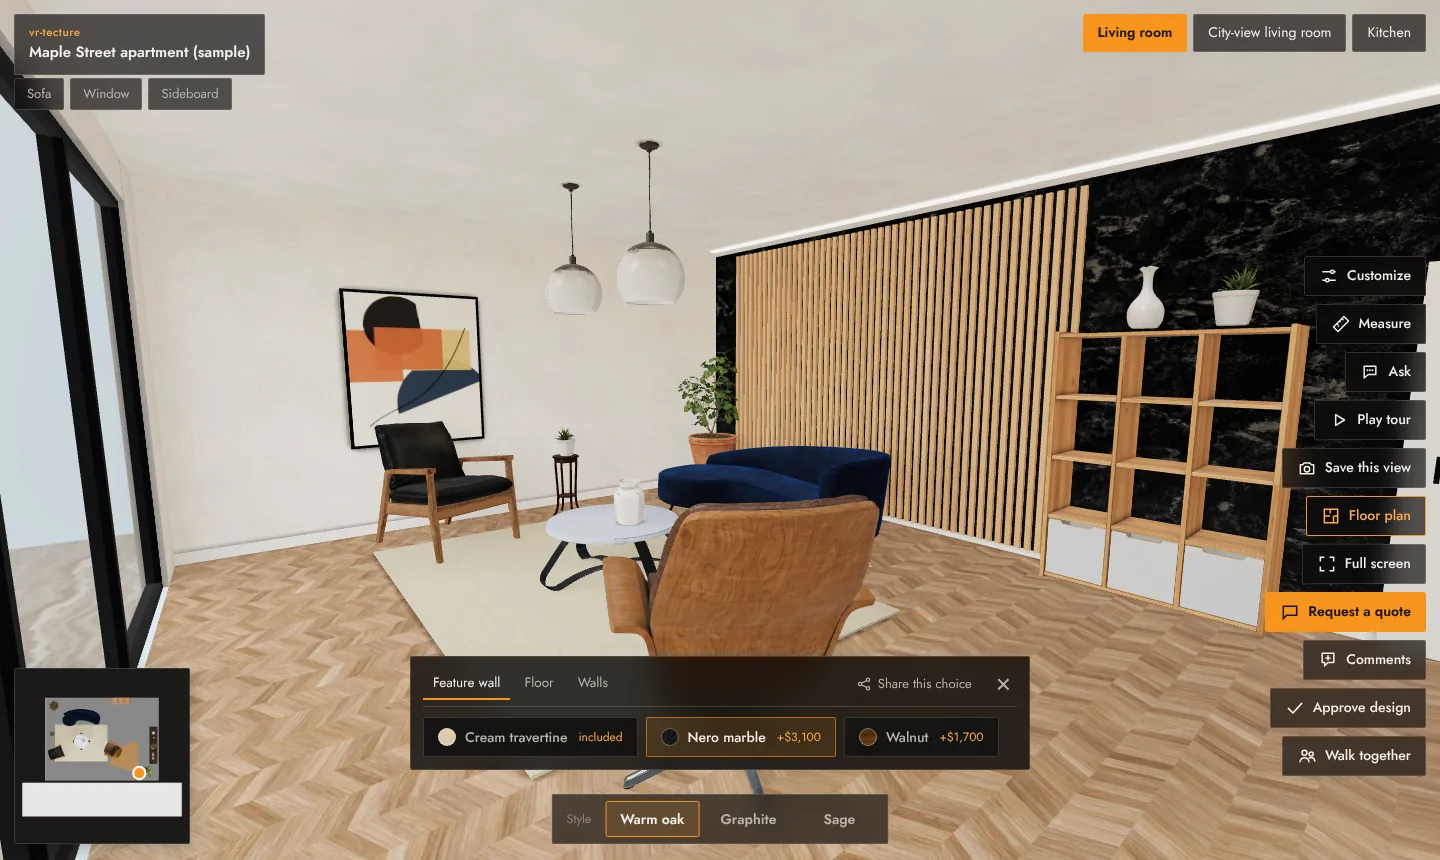
Where the choices show up
- In each request under Requests, as Selections. See Quote requests.
- In the approval record. See Design approval and its record.
- In Tour insights, under What visitors picked.
- The AI assistant knows the options and prices and can switch them when the client asks.
Items that are separate objects in the model (a sofa, a pendant) can be switched too. See Let clients swap furniture and fixtures.